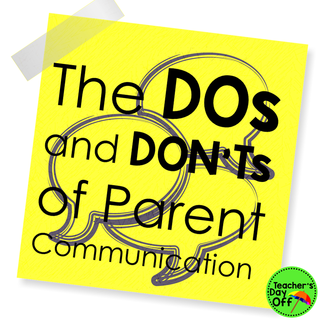
 Dealing with parents was one of my least favorite parts of being a teacher. I am an introverted person, so talking to parents was really difficult for me. But I found ways to deal with my fear of talking to parents because it is such an important part of being a good teacher. If you communicate with parents regularly your life will be so much easier. So, I am going to share with you about the best ways I found to communicate with parents. Plus, there’s a freebie! DON'T feel like you always have to call parents. DO use the form of communication that you are most comfortable with AND that is most appropriate for the situation. I hate talking on the phone, so I would send emails and notes as often as a could. This was a comfortable way for me to talk to parents and still maintain regular communication. However, some of the time calling is the most appropriate way to address a situation. If something serious happened at school, like a student hurting another student, I would call home. Things can be misunderstood in writing, so if you would be able to communicate more clearly by speaking to a parent, do so. You don't want to make the situation worse by creating a misunderstanding. DON’T contact parents only when there is a problem. DO contact parents about their students’ positive and negative behavior. Letting parents know about what their child does well, in addition to any negative behavior will make them so much more receptive and willing to help you solve any problems their student may have. If possible, try to make your first contact with parents be about something positive their student did. Set a goal for how many parents you will contact each day during the first few weeks of school. Then, look for something good that each student does and tell their parents about it. Parents are used to being told when their child does something bad at school, so you will surprise them by telling them about something positive. DON’T wait for parents to ask you about what is happening in class. DO send out a regular newsletter about what is happening in your class. I sent out a monthly newsletter to inform parents of important events and news, such as picture day, class parties, or spirit week. So, set a date each month or week and make sure to send a newsletter home. And, be sure to inform parents at the beginning of the year of when to expect the newsletter. This will save you so much time because you will receive less emails and phone calls asking about what is going on. DON’T rely on yourself to keep mental notes about each time you contact a parent. DO keep track of every time you communicate with a parent. Keep a log of when you contact a parent, how you contacted them, what you contacted them about, and anything they said in response. Also, keep track of how often you contact parents about positive and negative behavior. This will help you to see if you need to look for more positive behavior in a certain student. Here are FREE parent communication forms that you can use to help you stay organized. There are three forms (1 parent communication form in a whole class format, 1 parent communication form in an individual student format, and 1 positive/negative contact tracker). 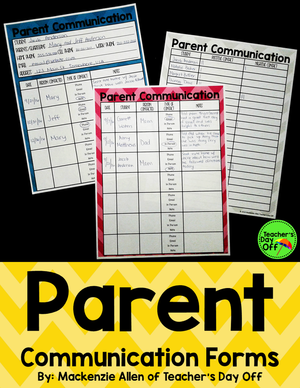 By putting in a little bit of effort to reach out to parents, your classroom will run smoother, you will be able to better connect with your students, and your life will be just a little less stressful.
Happy planning! Mackenzie 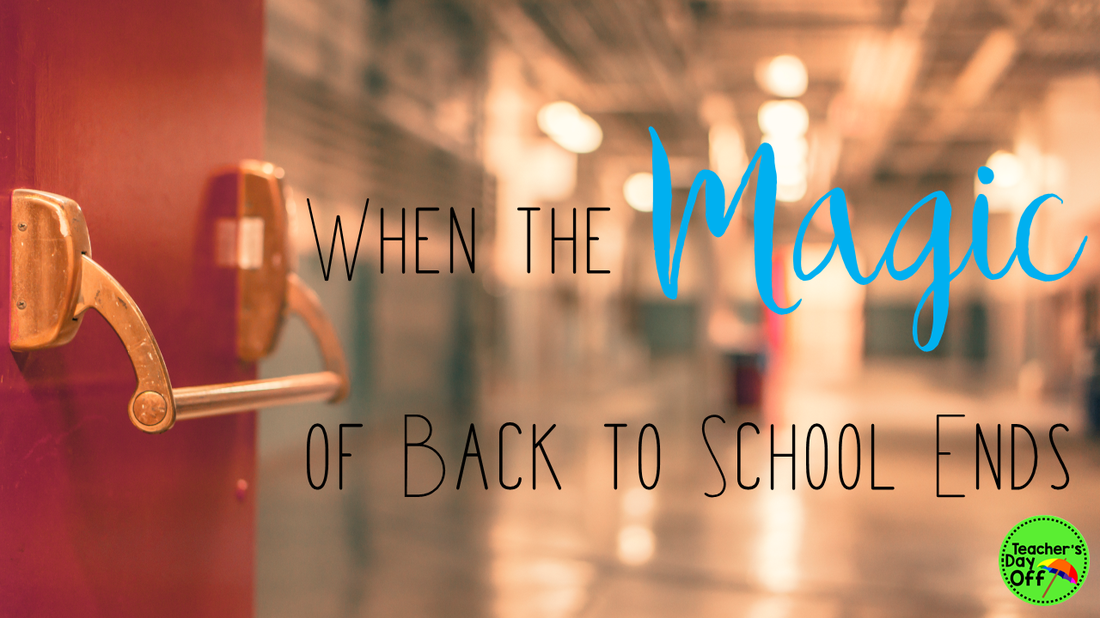 I love Back to School. Teachers are excited to meet their new students (maybe a little nervous if you know you have that “one” student on your class roll.) Students are excited to meet you and see what friends they’ll have in their class. Usually, the students are fairly mellow the first few weeks of school because they are still nervous and getting used to their classroom. However, we all know that this doesn’t last. Eventually the magic of back to school stops, and many of you find that some of your students are not as calm and willing to please as they were when school first started. For me, this seemed to happen around the beginning of October. I think it was a combination of the kids getting comfortable in class and Halloween approaching. Why they get excited for Halloween a month before, I don’t know. So, what are you supposed to do when you notice your kids start to not comply with the rules?
1. Have High Expectations I was strict at the beginning of the school year. I did this so that I could loosen up a little later but still have a well-managed class. So, once your kids meet your expectations, it is okay to loosen up a little bit. But, the moment you notice that your students are getting a little too comfortable in your class and are starting to test you, buckle down. Remind your students of the high expectations. If that means taking time out of a lesson to practice procedures again, do it. Don't accept anything less than what you want when it comes to managing your class. 2. Be Consistent This is the time of year where some of your students are getting comfortable in class and will start to test the waters. Don’t let your students get away with not following procedures or breaking one of the rules. The moment your students see you ignore misbehavior, you are allowing them to walk all over you. If you are not consistent with your management, your class will become impossible to manage. Don't let things slide. So if you feel really strongly about having something done a certain way in your class, make sure the students do it correctly every single time. 3. Reward Them Most of you probably have reward systems in your class. I had a whole class, group, and individual reward system in my class. After introducing each reward system, I tried to give my students a reward quickly so that they saw they would actually get rewarded for good behavior. This increased their motivation a lot. So, if you haven’t had a class party, or given your students whatever reward they might be working towards yet, try to do so quickly. If it takes them forever to earn, the students will eventually stop trying, especially in the younger grades. Find every opportunity you can to give them that point, sticker, clip up, or whatever they need to earn that reward. Once you give them a reward once, then you can slow down on how often you give them those points. But give your students some encouragement, by rewarding them quickly at first. 4. Change Things Up Hopefully your students aren’t already bored with the management systems you have in place, but if you notice that your students are not responding as well to your attention signals, reward systems, or even the seating chart, change things up. I ended up changing my reward systems about once every quarter to keep my students motivated. Usually they would work towards earning the same or very similar rewards, but I just changed the way it was presented, and it worked. They were all of a sudden motivated to follow the classroom rules again. 5. Praise Praise Praise Praise is my favorite management tool. If you use it correctly, it can prevent or stop most misbehavior. Praise can be particularly useful in cueing students to remind them of the expectations. I was able to correct many of my students’ behavior simply by praising a student close in proximity to them for doing the thing that my target student wasn’t. Once, they corrected their behavior, I would then reinforce it by praising them. For example, if Billy shouts out an answer instead of raising his hand, I would say to Maggie, who sits at the same table group as Billy, “Thank you Maggie for raising your hand.” Then, 9/10 times, Billy will remember the expectations and raise his hand. As soon as he does this, I reinforce his behavior by saying, "Thank you Billy for remembering how to make a comment in class." For particularly difficult students, it can be extremely hard to find any time to praise them, but you have to force yourself to look for it. These students need to hear it most. They are so used to being called out and being told what they are doing wrong, that they start to expect only that. Praise these students for the simplest things. They might not be sitting exactly how they are supposed to, but they are looking at you. Or they might have not been doing their work, but they just picked up their pencil to write their name at the top of their paper. Praise them for anything you can. Pointing out what they do right will have so much more meaning to them than pointing out what they do wrong. It will be hard at first to find anything, but if you really try, eventually it will get easier for you to find things because these difficult students will start to expect to receive praise and will try to have the behavior to earn it. So, maybe your class isn’t as compliant as they were a month ago, or maybe they were never as compliant as you wanted them to be because you didn’t focus as much as you needed to on management. Wherever you are, there is a way to regain control of your classroom. It can be tempting to blame it on your students because they are the ones misbehaving. But, it can be helpful to take a step back and think about what you are doing, or even aren’t doing that could be causing them to act this way. You can’t control your students, but you can control you, so look for ways that you can improve your classroom, and often times this will improve your students. Happy planning! Mackenzie 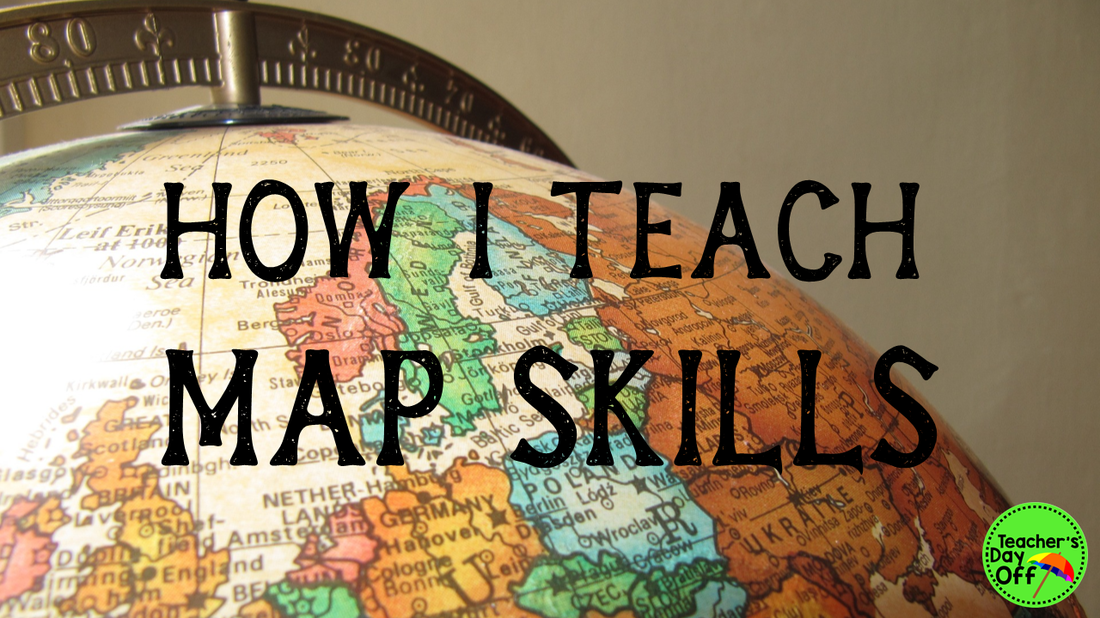
Map skills was one of my favorite social studies units to teach in 2nd grade. With everything becoming digital, it is easy to push this topic to the side if you don’t have enough time to cover all of the standards (which we never have enough time for). There are GPSs and Google Maps to tell you how to get everywhere, but using a map is still an important life skill to have. You still have to have some knowledge of maps to use digital maps. Plus, technology fails. A lot. I know my GPS has no idea where I am half of the time. So, it is still something that we need to teach our kids. Here's how I teach it:
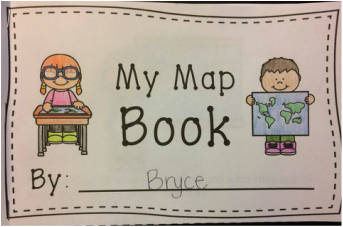
For a lot of my unit, I use the materials in my Where in the World? Map Skills Mini Unit (link at the bottom of the page), so most of the activities I talk about can be found in there. First, I teach an introductory lesson about maps. I make a map of the classroom and show it to my students and we talk about what a map is, what they can tell us, and why they are useful. Then, I spend the rest of the lesson introducing the vocabulary for the unit. In 2nd grade, I teach them:
This interactive reader is a fun way to introduce these vocab words, and it lets your students get a little practice using the features on maps.
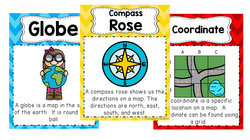
My map skills pack has anchor charts and picture vocab cards for all of these words that you can hang up to help your kids remember. Now, I know this might seem like a lot for a 2nd grader, but they are so capable. I found fun ways to introduce the words. For example, for key, I make a map of the classroom, but use random symbols to represent everything. I ask them what it was a map of, and naturally none of them can figure it out. Then, I show them a key, and asked them what the map was. Students then start to figure it out. After we talk about the vocab words, we practice finding map features on different maps on the Promethean board. I let the students come up and circle the items. They love being able to use the board! After this introductory lesson, I teach a lesson on keys. I think this is one of the map features the students need to learn first, because they have to know what they are looking at before there will be any point to them using coordinates or the compass rose. In the pack there is a fun color by item worksheet where the students use the key to color the items on the map the correct colors. This is a pretty easy skill for the kids to pick up on, and I only spent a mini lesson covering it. 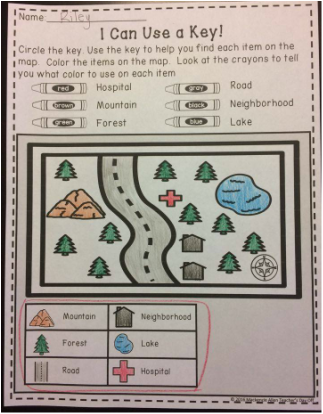
Next, I teach how to use a compass rose. This is by far the skill my students have the hardest time with, so I have had to do a lot of experimenting to figure out what works for them. I only teach north, east, south, and west. I don’t teach northwest, southwest, or anything like that. My high kids naturally pick up on this, but I never explicitly teach it. I first teach the kids what the directions are. I use the acronym Never Eat Soggy Waffles to help them remember the order of the directions on the compass rose. My students think this is hilarious, and they never forget it. To introduce how to use a compass, we do a treasure hunt activity (included in the pack) where the kids get to practice being “GPSs.” I place a card with a cardinal direction on the corresponding wall in my class. I send one student into the hall and have another hide a picture of a treasure chest. Then, the student comes back in and students take turns telling the student how to get to the treasure chest using only cardinal directions. It is a fun activity, and you can do it again and again. Then, we do a moving map activity. I draw a large rectangle on a whiteboard. I cut out different items that are typically on maps, such as a neighborhood, restaurant, forest, etc., that I print on paper. I cut out a compass rose and a key. I place all of these in the rectangle on the board to create a map. I use tape on the back of each paper, so they are easy to move around. I also cut out a picture of a kid that I place on the board, and I will tell you why in a second. Then, I hold up a sentence strip such as “The airport is ______ of the restaurant.” The students have to use the compass to figure out what cardinal direction goes in the blank. To help them do this, we first figure out where the kid is starting at and place them there on the map. So in this case, the kid would start at the restaurant. Then, we figure out what direction the kid needs to go to get to the airport. After practicing some as a class, you can turn it into a competition and have the students answer on whiteboards individually or in teams. After completing each sentence strip, I have a student come up and move items around on the map. This activity is great because it is like the kids are looking at a new map each time. Everything you need to do this activity is included in my pack. Coordinates is my favorite concept to teach in this unit. I do an activity called “Guess Where?” with my students, and they love it! (This is included in the pack.) The students cut out items and place them on a grid to create their own map. Then, they pair up with another student to play a game. The students bring their map with them and then get a blank grid where they are trying to recreate their partner’s map the fastest. They take turns guessing coordinates. If they guess a coordinate that has an item in it, their partner tells them what the item is, and they place the item on the blank grid. The first student to recreate their partner’s map, wins. 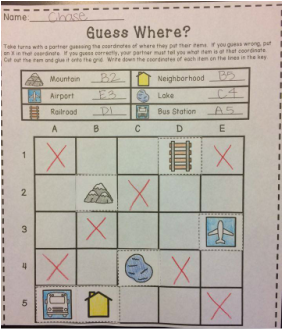
To teach the students about the continent, country, state, and city they live in, I first do a direct instruction mini lesson and show them where all of the places are on a map. Then, we do an atlas scavenger hunt. I had a set of small atlases in my class, so I paired my students up and had them work together to find our continent, country, state, and city, as many times as they could in the atlas and write down the page number. Give them a time limit and make it a “race” to get the students excited. It gives them great practice finding them on various maps.
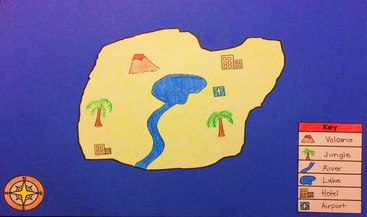
To close up the unit, I have my students create an island. I give them specifications for what the map needs to include, but then let them be as creative as they want. Then, you can have the students answer questions about their map. Included in my pack, along with the materials to have your students make an island map, is a fun writing extension to have your students persuade tourists to come to their island. This was my students’ favorite activity of the unit, and I think it is a fun way to finish up.
I hope this gave you some ideas of how to teach map skills in your class.
Happy Planning! Mackenzie  I became a teacher because I wanted to work with students, and I am sure a lot of you are teachers for the same reason. Teaching is the best part of the job. It's why we do what we do. But, in order to teach, we have to plan and prep. And unfortunately, this usually means several hours of work after the kids have gone home. Planning was one of my least favorite parts of being a teacher. Planning can eat away your time if you let it, especially for new teachers. So, here are some things that you can do to help yourself have a life outside of teaching.
1. HAVE ROUTINE LESSONS Now, what I mean by routine lessons is that you follow the same basic layout for the weekly lessons in a certain subject. Look at your weekly schedule and decide what subjects you can have a routine for. Some easy subjects to do this for are phonics, writing, and vocabulary. Here is the routine I had for phonics: Pre-Assessment: Each Friday, I give a reading quiz to assess the phonics sounds for the coming week. Day 1: I introduce the sound and we work on reading isolated words with the pattern. The students do a word sort on their own. Day 2: We review the sound and practice identifying the sound pattern in sentences. Day 3: We read a short story and highlight the sound pattern in the story. Day 4: We play a game involving the sound pattern to review what we learned that week. Post-Assessment: Each Friday, I give a reading quiz to assess whether or not the students have mastered the sound pattern for the week. And this is what phonics looked like in my class every week. I had a routine, so I could easily and quickly plan the week of phonics lessons. If you have a routine for a couple of your weekly lessons, it will greatly reduce your planning time, and you will have one less things to stress about. If you try to come up with an original idea for each lesson, you will go insane. Having a routine for some of your lessons is okay. It will save you so much time, and students actually like to have structure. Now you don't always have to stick to the routine. If you come up with a fun activity for one of the subjects that you follow a routine for, use it! It is good to spice things up occasionally. But, don't kill yourself trying to constantly come up with new activities. 2. GET YOUR MATERIALS READY EARLY There is nothing worse than rushing to school to make your copies for the day only to find that the copier is out of toner or is broken (this always seems to happen when you need it the most). So, get in the habit of getting your materials ready for the coming week on Friday. I had a drawer in my class were I had 6 folders: 5 folders were labeled with each weekday, and 1 folder was labeled "Extra Materials." I would make copies for my coming lessons and gather any other materials, like picture books, or game boards, and put them in the corresponding folders. Then, all I had to do, was come to school, and grab the folder with all of the materials for the day. I used the "Extra Materials" folder to put copies and materials for lessons we didn't have time for. If something with another lesson went wrong, or if we had extra time, I had these lessons to turn to. I rarely had to use this, but it was worth it to have peace of mind. Now I realize that it can be unrealistic to have your whole week of lessons completely planned because things change, and some of the time you have to change your lessons depending on how the kids are doing with the content. But, you can at least gather the materials for your routine lessons like we talked about above and you can surely get everything ready for all of your Monday lessons. Trust me, putting in a little bit of extra work on Fridays will save you so much time and stress during the week. 3. SET A TIME LIMIT It is so easy to spend hours and hours getting your lessons perfect. But the thing is, your lessons don't need to be perfect. So, allot yourself a certain amount of time to spend planning each lesson, and if you need to, set a timer. And be sure to stick to it! If you want to spend time making one of your lessons amazing, that's great. Give yourself more time to plan that lesson, but then spend less time on the others. Once that timer goes off, it is time for you to go home. Don't let teaching consume your life. I know it is hard because you get attached to your students and you really want to help them, but you also need to remember that this is still a job. And just like any other job, it is only meant to be a part of your life, not your whole life. So, if you had a goal to be out of the school by 5, when 5 o'clock rolls around, you'd better be on your way out the door. Teaching can be the greatest job in the world if you let it be. But, spending all of your time prepping won't make you love your job. In fact, it will burn you out quickly. Be the best teacher you can be, but also know when to stop. It's okay if every lesson isn't exactly perfect. I promise, your students will be just fine. Happy planning, Mackenzie 
When I was teaching, I tried to avoid using worksheets as much as I could. Don't get me wrong, they occasionally have their place, but let's face it, worksheets just aren't the most fun thing. Engaging students is one of the best ways to help them learn. If they are motivated to learn, they will learn so much more. So, here are some easy ideas you can use to replace worksheets in your class.
Teacher vs. Students This was one of my students favorite activities, and it's super simple. Simply post a problem on the board and have the students answer it on individual whiteboards. Then, when you say, "Boards up," students hold their boards above their head and you can easily see who is understanding. Randomly pick a student; I used name sticks to do this. When you check the boards, be sure to check if this student is correct. If they are, the students get a point, if they aren't, the teacher gets a point. I only said the student's name if they were correct. If they were incorrect, I would say "Oh, our secret student wasn't quite right." This keeps students from getting embarrassed. This activity is also one of my favorites because it allows me to build the confidence of my shy or low students. Some of the time I would disregard which name stick I had drawn if I saw that one of these students had got the question right. Then, the whole class got to celebrate this student, which really helped to give them more self-efficacy. Plickers Plickers is such an awesome technology resource you can use in your class. Plus, it's free! Plickers is a way to allow your students to respond to questions using a QR response card. Write multiple choice or true/false questions on Plickers' website. You can then project this onto a screen. Give each student a QR code that you print out from the website. Each side of the QR code is assigned a different letter (A, B, C, and D). The students respond to the questions by rotating their card to have the side with the corresponding letter at the top of the card. You can then scan the room with your phone and it will read all of the QR codes. The students' responses are displayed on the screen so you can discuss what people thought the answer was and why. All of this data is saved, so you can go back and review it to see how each student performed. It takes some training to get your students used to it, but once they get it down, it can be such a great resource for you. Task Cards I love task cards. They are so versatile so you can use them again and again. They can accomplish the same objective as a worksheet, but they can be so much more engaging if you use them in the right way. Paper Bag Questions Tape tasks or questions to the front of brown paper bags. Place the paper bags around the class with small slips of paper next to each bag. Have students walk around to each bag and answer the question on a slip of paper and place it in the bag. Once the students have answered the questions, you can go over each question and some of the solutions that students gave. Graffiti Wall Many students love art, so a great way to address the multiple intelligences in your class is to let them show what they learned through art. Place large pieces of butcher paper on the walls around your class. On each paper write at the top what you would like your students to draw a picture about. This activity is great for vocabulary, phonics or reading comprehension, but can also be used in other subjects. Once students have drawn pictures on each poster, you will have your own graffiti wall in your class that the students can reference. Foldables I used foldables a lot in my class. The students love to make them, and they actually want to keep their work when they finish. Pick the type of foldable you are going to use, and walk through how to create it with your students. I would switch up the kind of foldables I had them make (flip books, 4 folds, etc.) and this kept them engaged. Then, give your students a problem or task to complete in one of the sections or pages of their foldable. While they work, this is a great opportunity for you to scan and see who is getting it and who isn't. You can have a student then come up to the board and show how they completed the task or problem. Snowball Fight Give each student a piece of white paper. Give them a problem or task to complete. When the class is finished, have the students crumple up their piece of paper. Then, they get to throw their "snowball." Each student goes and finds a piece of paper and opens it up. They look at the answer and see if they agree or disagree. This can make for a great class discussion. For a more controlled snowball fight, draw a target on the board and have the students aim at it. Then, have the students come up a few at a time to get a "snowball." Comics Have your students create a comic to explain the concept that you covered in a lesson. Your students will surprise you with how creative they can be. Then, allow some of your students to read their comics, or do a gallery walk around the room so the students can see all of their classmates' work. Pass the Poster Write a task, problem, or topic at the top of pieces of butcher or poster paper. Have the students work in groups, or individually to add information to a poster for a given amount of time. When time is up, rotate the posters. Once each group has been able to add to each poster, go over the posters as a class. Mind Maps Mind maps are a unique way to assess what your students learned during a lesson and they are so fun for the kids. Give each student a piece of paper. I recommend at least 11" x 17" to give your students enough room. Have your students put the topic in the center of the paper. They can write it in bubble letters, or draw a picture of it. Then, they create a web from this topic by drawing pictures that go along with the topic. For younger grades, it can be helpful to have them write notes next to their pictures so you don't have to spend forever deciphering their picture. By the end, their mind map should be a good representation of what was covered in the lesson or unit. I hope that you found some activities you can use in your classroom. If you have activities that you use in your class that work great, please comment below. Happy planning! Mackenzie |
AuthorHi! I'm Mackenzie. Teacher, wife, and Washingtonian. Check out my blog to get ideas and products for your class. Archives
December 2016
Categories
All
© Mackenzie Allen 2016.
ALL RIGHTS RESERVED. |
 RSS Feed
