
It definitely feels like fall here in Seattle. I’ve actually been busy getting prepared for a big storm that is supposed to hit tomorrow. Hopefully things don’t get too crazy!
But, I really do love fall. Halloween is one of my favorite holidays, except at school. For elementary teachers, it is one of the worst days of the school year. And this year it is going to be particularly bad because Halloween is on Monday. Yes. Monday. The worst day it could possibly be on. But, I just finished my Halloween Party Pack that will make planning your class Halloween party a breeze. It is packed with way more than you can fit into an hour long class party. I'm talking 100+ pages packed! I had so much fun making this, and I hope that you will find it useful in your class. Here’s a sneak peek of the pack: First in the pack, is editable invites. I highly recommend sending out invites about the Halloween party. It’s a great way to get donations for the party and parent volunteers. Plus, it is an easy way to communicate your school’s rules on Halloween costumes so you don’t have to send any kids to the office to get a change of clothes. 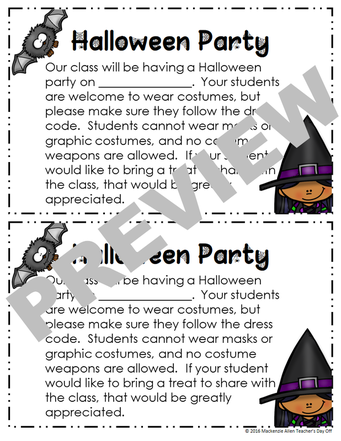
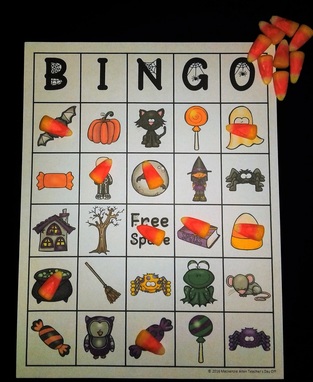
Next, there are 60 Halloween bingo cards. I’ve included 30 colored and 30 B&W cards just in case your school doesn’t have a colored printer (I wish mine had!). My students loved to play bingo, and I did it for almost every class party. To add extra fun, I let my students play with candy corn.
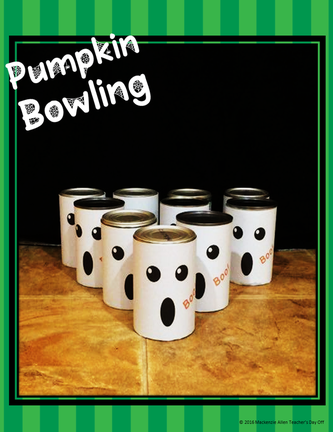
Another fun game that is included in the pack is pumpkin bowling. It’s exactly what it sounds like. Have the kids knock over cans with a pumpkin. I’ve included the directions, supplies to make the pins, and a scoring sheet.
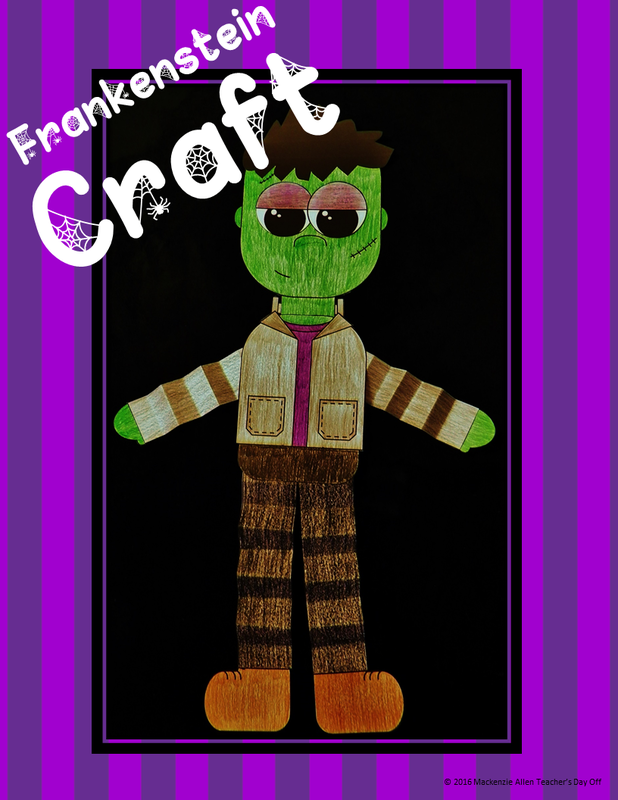
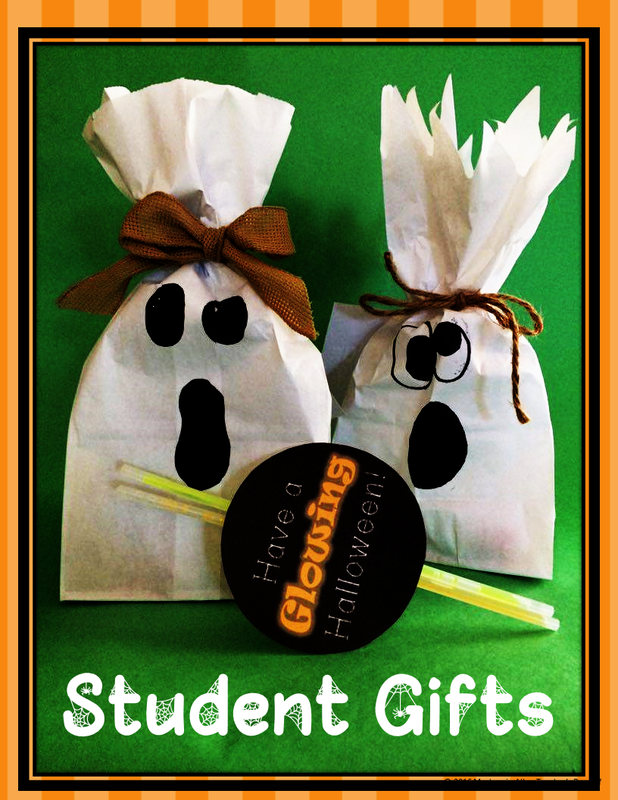
There’s also this adorable Frankenstein craftivity in the pack, and some super cute student gift ideas with premade gift tags.
Now, there is even more included in the pack, but if I showed you all of it, it wouldn’t be much a sneak peek, now would it? If you want to see what else is included, click here to head on over to my store.
Extra Tips
Unfortunately, there is nothing in this pack to make your kids any less crazy on Monday…or Tuesday for that matter, but it will make life a little less stressful for you. Happy Halloween! Mackenzie 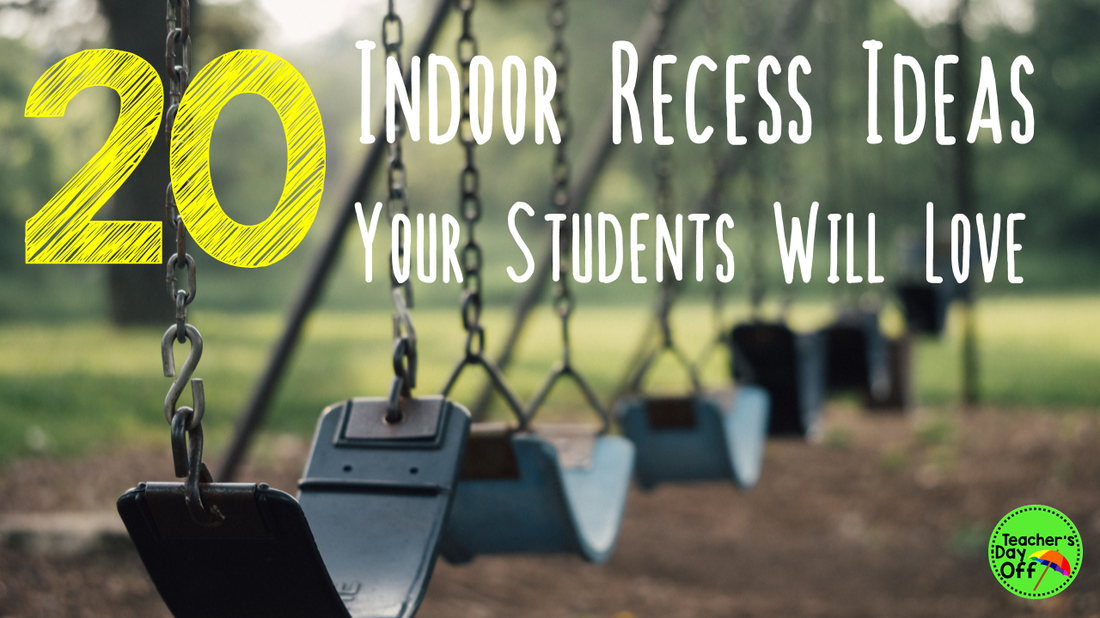
Well, it’s starting to get to that time of year where indoor recess is going to be happening. I know that here in Seattle, the summer weather is definitely on its way out. Indoor recess is the worst. The students are so antsy from being inside and sitting all day, and you are antsy from being with students all day. So, it is so nice to be able to send them outside where they can get their energy out and you can take a breather (or cram in more work).
I am very familiar with indoor recess. I actually had to do indoor recess once a day, every day. That’s right. Every. Day. The 2nd grade team at my school got the short end of the stick when it came to the daily schedule last year. Recess for 2nd grade was scheduled less than an hour after school started, and it made it so that I couldn’t have a one-hour, uninterrupted chunk for a lesson for the whole day. So, instead of taking my students outside for this very early morning recess, we would do an indoor recess later in the morning. It wasn’t the most ideal, but I made it work so that I could teach math without having to stop in the middle to go outside for recess. So, as you can imagine, I had to come up with quite a few ideas for indoor recess. Now, hopefully you don’t have indoor recess every day, but on the occasions that you do, here are some things that you can try. I’ve included quite a few games that I know many of you probably know how to play, but just in case you don’t, I have included a quick summary of the rules for them. If you know the rules, great! Just skip over that part. 1. Go Noodle: If you haven’t heard of Go Noodle before, check it out. It was a life saver for me. It has free, fun videos that get the kids up and moving. All you have to do is press play.
2. Dance Dance Revolution: There are plenty of kid-friendly videos of people playing Dance Dance Revolution online. Find videos where only the screen is shown (not the actual person dancing) and have your students follow along. The kids will actually think they are the ones playing!
3. Boggle Competition: Create a 4x4 grid of random letters on the whiteboard or project it on a screen (be sure to include vowels). Give each student a piece of paper. Set a timer for 3 minutes and see how many words the students can find in that amount of time. The words must be at least 3 letters long, and they have to make the words out of letters that are touching the letter that comes before it in the word. They can touch horizontally, vertically, or diagonally. For example, if they found "cat". The c has to touch the a and the a has to touch the t, but the t and the c don't have to touch. The person who finds the most words wins. 4. Puzzles: Keep a few different puzzles on hand. If you have an unexpected indoor recess, you can just pull them out. The kids love to work on them. 5. Board Games: Buy some used board games at a thrift store to let your students play. Just be sure to buy ones that are not too complicated or long, or take forever to set up. 6. Word Searches & Crosswords: Print out word searches and crosswords from online. Laminate them and have the kids use dry erase markers on them. Then, they can be used again and again. 7. Picture Searches: Have some I Spy books in your class or print out picture searches from online, laminate them and have your students write on them with dry erase markers. 8. Coloring Books: Buy cheap coloring books from the Dollar Store or the Target dollar spot. Rip out enough pages for each student to have one. Let quiet students come and choose a page first. Your class will be so well behaved! 9. Math Manipulatives: I know this sounds like a weird activity, but my students loved to play with the pattern blocks I had, and they actually made some really cool designs out of them! So, if you have some fun math manipulatives in your class, and you don’t mind your students playing with them, it can be a really easy indoor recess. 10. I Spy: Pick an object in your classroom, and say "I spy with my little eye something [insert adjective describing the object]. Then, have the students take turns guessing what it is. You can also let your students be it; they love to! Just be sure to limit the amount of guesses for each round, or it can keep going forever! 11. Telephone: Have the students sit in a circle and play a fun game of telephone. Come up with a sentence and whisper it into a student’s ear. Have them whisper the sentence to the next student, and continue this until the last student hears the sentence. See if the sentence is still the same by the time it gets to the last person. It can be pretty funny! 12. 20 Questions: This became one of my students’ favorite things to do during recess. Pick one student to be it. They have to think of a noun and then the rest of the class tries to guess what it is by asking up to 20 yes or no questions. Whoever guesses correctly is it. 13. 4 Corners: Number the corners of your classroom 1-4. Have one student close their eyes and count to 10 while the rest of the class walks to one of the corners. The student calls out one of the corner numbers. Whoever is in the corner is out and has to go back to their desk. The last student standing wins. 14. Heads Up 7 Up: Pick 7 students to be it. Say “Heads down, thumbs up.” Everyone else puts their heads down on their desks and sticks one of their thumbs up. The 7 students each tap one person’s thumb. Then, you say “Heads up, 7 up,” and the 7 students who had their thumb tapped stand and try to guess who tapped their thumb. If they guess correctly, they take that person’s spot as being it. 15. Simon Says: I love to do this activity because it gets the kids moving, which can be hard to do during indoor recess. Pick some one to be “Simon.” The students have to follow what they "Simon" says if they say “Simon says [insert action here.” If Simon does not say “Simon says” and the students do the action, those students have to sit down. For example, if Simon said, “Simon says jump in place,” then the students have to jump in place. But if Simon says, “Jump in place,” the students are not supposed to jump in place. The last person standing is the next “Simon.” 16. Charades: Write down people, animals, common actions, etc. on slips of paper, or if you want, you can even just whisper the things into the students’ ears if you don’t want to make the slips. Have one student act out whatever is on the paper without talking. The class has 1 minute to guess what they are doing. If they guess before the minute is up, they get a point. You can divide the students into teams and have them compete against each other if you like. 17. Trashketball: Buy a medium-sized, soft ball. Set an empty trashcan at the front of the class. Divide the class into 2 teams. Ask a person from each team a trivia question, or even a question related to something you have been learning in class. The first student to raise their hand and answer correctly gets to shoot the ball into the trash can. If they make it, they get a point. You can set up tape lines at varying distances from the trash can and award a different amount of points depending on how far they shot from to make it a little more interesting. 18. Drawing: Give the students blank paper and just let them draw. Simple, but fun. 19. Freeze Dancing: Put on some fun music and have the students start dancing. When the music stops, the students have to freeze in the pose they are in. If they move, they are out. 20. The Statue Game: Pick one student to be it. They say a person, animal, or object and the students have to become a statue of that. For example, the person who is it might say, “Grandma.” Then, the rest of the students make their best statue of a grandma. The person who is it, picks the best statue, and that students is then it. I hope that this gave you some ideas of what you can do, so that when you hear the dreaded announcement over the intercom, you’ll be ready to keep your students entertained. Happy planning! Mackenzie 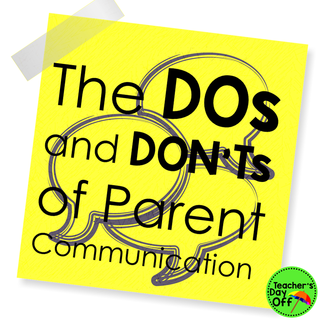 Dealing with parents was one of my least favorite parts of being a teacher. I am an introverted person, so talking to parents was really difficult for me. But I found ways to deal with my fear of talking to parents because it is such an important part of being a good teacher. If you communicate with parents regularly your life will be so much easier. So, I am going to share with you about the best ways I found to communicate with parents. Plus, there’s a freebie! DON'T feel like you always have to call parents. DO use the form of communication that you are most comfortable with AND that is most appropriate for the situation. I hate talking on the phone, so I would send emails and notes as often as a could. This was a comfortable way for me to talk to parents and still maintain regular communication. However, some of the time calling is the most appropriate way to address a situation. If something serious happened at school, like a student hurting another student, I would call home. Things can be misunderstood in writing, so if you would be able to communicate more clearly by speaking to a parent, do so. You don't want to make the situation worse by creating a misunderstanding. DON’T contact parents only when there is a problem. DO contact parents about their students’ positive and negative behavior. Letting parents know about what their child does well, in addition to any negative behavior will make them so much more receptive and willing to help you solve any problems their student may have. If possible, try to make your first contact with parents be about something positive their student did. Set a goal for how many parents you will contact each day during the first few weeks of school. Then, look for something good that each student does and tell their parents about it. Parents are used to being told when their child does something bad at school, so you will surprise them by telling them about something positive. DON’T wait for parents to ask you about what is happening in class. DO send out a regular newsletter about what is happening in your class. I sent out a monthly newsletter to inform parents of important events and news, such as picture day, class parties, or spirit week. So, set a date each month or week and make sure to send a newsletter home. And, be sure to inform parents at the beginning of the year of when to expect the newsletter. This will save you so much time because you will receive less emails and phone calls asking about what is going on. DON’T rely on yourself to keep mental notes about each time you contact a parent. DO keep track of every time you communicate with a parent. Keep a log of when you contact a parent, how you contacted them, what you contacted them about, and anything they said in response. Also, keep track of how often you contact parents about positive and negative behavior. This will help you to see if you need to look for more positive behavior in a certain student. Here are FREE parent communication forms that you can use to help you stay organized. There are three forms (1 parent communication form in a whole class format, 1 parent communication form in an individual student format, and 1 positive/negative contact tracker). 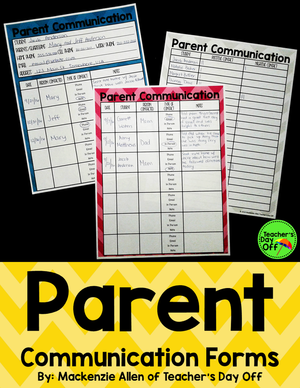 By putting in a little bit of effort to reach out to parents, your classroom will run smoother, you will be able to better connect with your students, and your life will be just a little less stressful.
Happy planning! Mackenzie 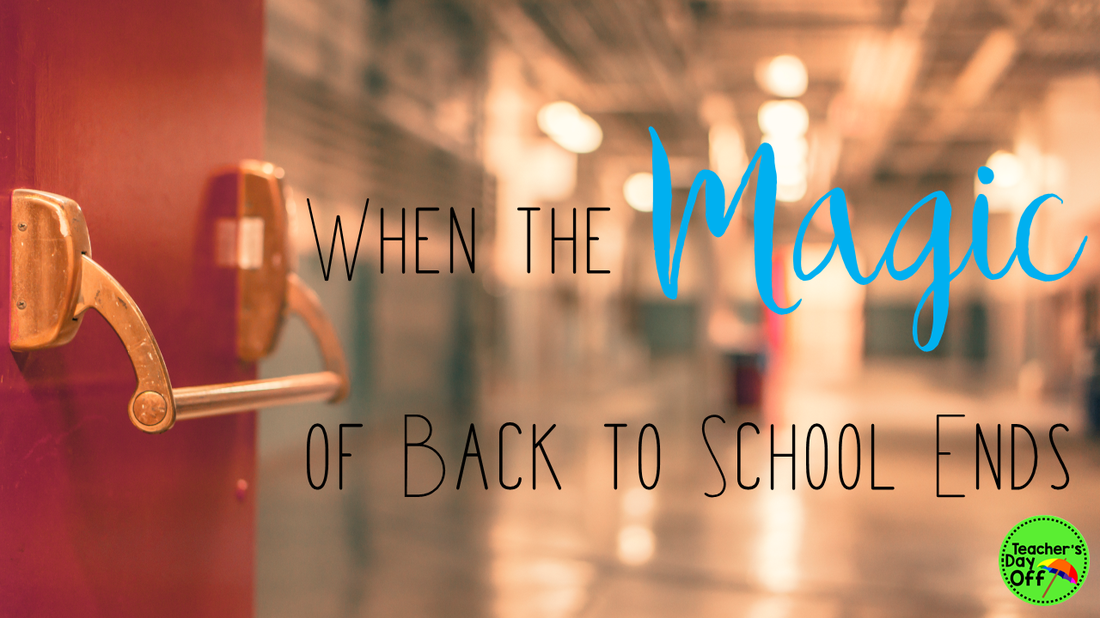 I love Back to School. Teachers are excited to meet their new students (maybe a little nervous if you know you have that “one” student on your class roll.) Students are excited to meet you and see what friends they’ll have in their class. Usually, the students are fairly mellow the first few weeks of school because they are still nervous and getting used to their classroom. However, we all know that this doesn’t last. Eventually the magic of back to school stops, and many of you find that some of your students are not as calm and willing to please as they were when school first started. For me, this seemed to happen around the beginning of October. I think it was a combination of the kids getting comfortable in class and Halloween approaching. Why they get excited for Halloween a month before, I don’t know. So, what are you supposed to do when you notice your kids start to not comply with the rules?
1. Have High Expectations I was strict at the beginning of the school year. I did this so that I could loosen up a little later but still have a well-managed class. So, once your kids meet your expectations, it is okay to loosen up a little bit. But, the moment you notice that your students are getting a little too comfortable in your class and are starting to test you, buckle down. Remind your students of the high expectations. If that means taking time out of a lesson to practice procedures again, do it. Don't accept anything less than what you want when it comes to managing your class. 2. Be Consistent This is the time of year where some of your students are getting comfortable in class and will start to test the waters. Don’t let your students get away with not following procedures or breaking one of the rules. The moment your students see you ignore misbehavior, you are allowing them to walk all over you. If you are not consistent with your management, your class will become impossible to manage. Don't let things slide. So if you feel really strongly about having something done a certain way in your class, make sure the students do it correctly every single time. 3. Reward Them Most of you probably have reward systems in your class. I had a whole class, group, and individual reward system in my class. After introducing each reward system, I tried to give my students a reward quickly so that they saw they would actually get rewarded for good behavior. This increased their motivation a lot. So, if you haven’t had a class party, or given your students whatever reward they might be working towards yet, try to do so quickly. If it takes them forever to earn, the students will eventually stop trying, especially in the younger grades. Find every opportunity you can to give them that point, sticker, clip up, or whatever they need to earn that reward. Once you give them a reward once, then you can slow down on how often you give them those points. But give your students some encouragement, by rewarding them quickly at first. 4. Change Things Up Hopefully your students aren’t already bored with the management systems you have in place, but if you notice that your students are not responding as well to your attention signals, reward systems, or even the seating chart, change things up. I ended up changing my reward systems about once every quarter to keep my students motivated. Usually they would work towards earning the same or very similar rewards, but I just changed the way it was presented, and it worked. They were all of a sudden motivated to follow the classroom rules again. 5. Praise Praise Praise Praise is my favorite management tool. If you use it correctly, it can prevent or stop most misbehavior. Praise can be particularly useful in cueing students to remind them of the expectations. I was able to correct many of my students’ behavior simply by praising a student close in proximity to them for doing the thing that my target student wasn’t. Once, they corrected their behavior, I would then reinforce it by praising them. For example, if Billy shouts out an answer instead of raising his hand, I would say to Maggie, who sits at the same table group as Billy, “Thank you Maggie for raising your hand.” Then, 9/10 times, Billy will remember the expectations and raise his hand. As soon as he does this, I reinforce his behavior by saying, "Thank you Billy for remembering how to make a comment in class." For particularly difficult students, it can be extremely hard to find any time to praise them, but you have to force yourself to look for it. These students need to hear it most. They are so used to being called out and being told what they are doing wrong, that they start to expect only that. Praise these students for the simplest things. They might not be sitting exactly how they are supposed to, but they are looking at you. Or they might have not been doing their work, but they just picked up their pencil to write their name at the top of their paper. Praise them for anything you can. Pointing out what they do right will have so much more meaning to them than pointing out what they do wrong. It will be hard at first to find anything, but if you really try, eventually it will get easier for you to find things because these difficult students will start to expect to receive praise and will try to have the behavior to earn it. So, maybe your class isn’t as compliant as they were a month ago, or maybe they were never as compliant as you wanted them to be because you didn’t focus as much as you needed to on management. Wherever you are, there is a way to regain control of your classroom. It can be tempting to blame it on your students because they are the ones misbehaving. But, it can be helpful to take a step back and think about what you are doing, or even aren’t doing that could be causing them to act this way. You can’t control your students, but you can control you, so look for ways that you can improve your classroom, and often times this will improve your students. Happy planning! Mackenzie 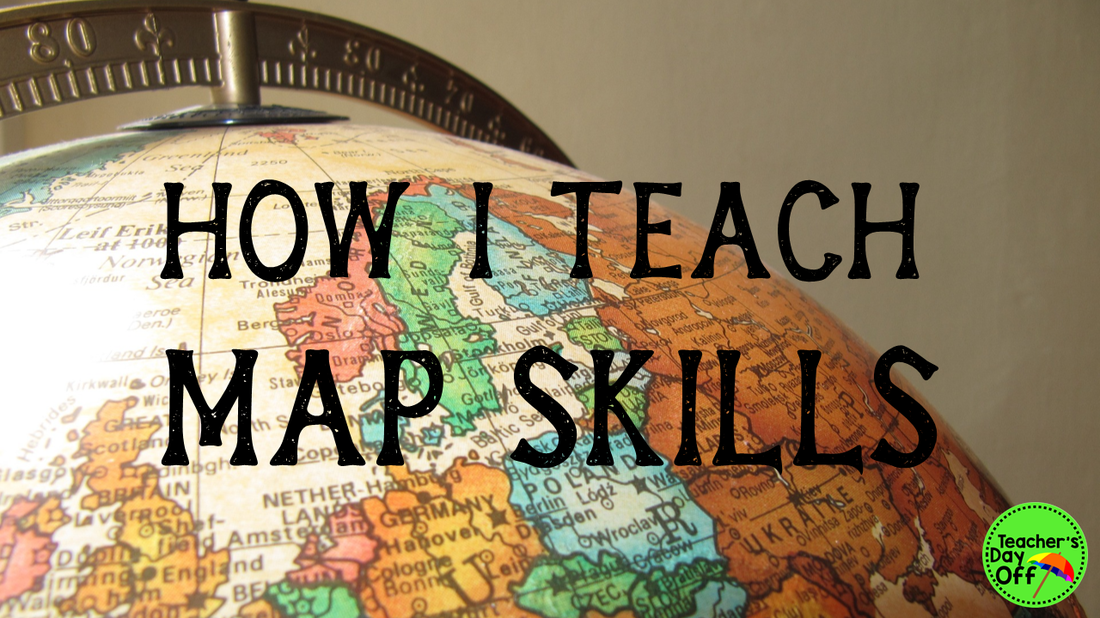
Map skills was one of my favorite social studies units to teach in 2nd grade. With everything becoming digital, it is easy to push this topic to the side if you don’t have enough time to cover all of the standards (which we never have enough time for). There are GPSs and Google Maps to tell you how to get everywhere, but using a map is still an important life skill to have. You still have to have some knowledge of maps to use digital maps. Plus, technology fails. A lot. I know my GPS has no idea where I am half of the time. So, it is still something that we need to teach our kids. Here's how I teach it:
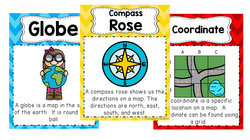
For a lot of my unit, I use the materials in my Where in the World? Map Skills Mini Unit (link at the bottom of the page), so most of the activities I talk about can be found in there. First, I teach an introductory lesson about maps. I make a map of the classroom and show it to my students and we talk about what a map is, what they can tell us, and why they are useful. Then, I spend the rest of the lesson introducing the vocabulary for the unit. In 2nd grade, I teach them:
This interactive reader is a fun way to introduce these vocab words, and it lets your students get a little practice using the features on maps.
My map skills pack has anchor charts and picture vocab cards for all of these words that you can hang up to help your kids remember. Now, I know this might seem like a lot for a 2nd grader, but they are so capable. I found fun ways to introduce the words. For example, for key, I make a map of the classroom, but use random symbols to represent everything. I ask them what it was a map of, and naturally none of them can figure it out. Then, I show them a key, and asked them what the map was. Students then start to figure it out. After we talk about the vocab words, we practice finding map features on different maps on the Promethean board. I let the students come up and circle the items. They love being able to use the board! After this introductory lesson, I teach a lesson on keys. I think this is one of the map features the students need to learn first, because they have to know what they are looking at before there will be any point to them using coordinates or the compass rose. In the pack there is a fun color by item worksheet where the students use the key to color the items on the map the correct colors. This is a pretty easy skill for the kids to pick up on, and I only spent a mini lesson covering it. 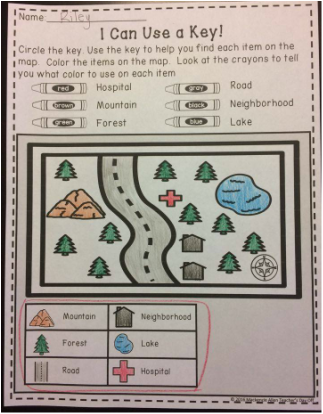
Next, I teach how to use a compass rose. This is by far the skill my students have the hardest time with, so I have had to do a lot of experimenting to figure out what works for them. I only teach north, east, south, and west. I don’t teach northwest, southwest, or anything like that. My high kids naturally pick up on this, but I never explicitly teach it. I first teach the kids what the directions are. I use the acronym Never Eat Soggy Waffles to help them remember the order of the directions on the compass rose. My students think this is hilarious, and they never forget it. To introduce how to use a compass, we do a treasure hunt activity (included in the pack) where the kids get to practice being “GPSs.” I place a card with a cardinal direction on the corresponding wall in my class. I send one student into the hall and have another hide a picture of a treasure chest. Then, the student comes back in and students take turns telling the student how to get to the treasure chest using only cardinal directions. It is a fun activity, and you can do it again and again. Then, we do a moving map activity. I draw a large rectangle on a whiteboard. I cut out different items that are typically on maps, such as a neighborhood, restaurant, forest, etc., that I print on paper. I cut out a compass rose and a key. I place all of these in the rectangle on the board to create a map. I use tape on the back of each paper, so they are easy to move around. I also cut out a picture of a kid that I place on the board, and I will tell you why in a second. Then, I hold up a sentence strip such as “The airport is ______ of the restaurant.” The students have to use the compass to figure out what cardinal direction goes in the blank. To help them do this, we first figure out where the kid is starting at and place them there on the map. So in this case, the kid would start at the restaurant. Then, we figure out what direction the kid needs to go to get to the airport. After practicing some as a class, you can turn it into a competition and have the students answer on whiteboards individually or in teams. After completing each sentence strip, I have a student come up and move items around on the map. This activity is great because it is like the kids are looking at a new map each time. Everything you need to do this activity is included in my pack. Coordinates is my favorite concept to teach in this unit. I do an activity called “Guess Where?” with my students, and they love it! (This is included in the pack.) The students cut out items and place them on a grid to create their own map. Then, they pair up with another student to play a game. The students bring their map with them and then get a blank grid where they are trying to recreate their partner’s map the fastest. They take turns guessing coordinates. If they guess a coordinate that has an item in it, their partner tells them what the item is, and they place the item on the blank grid. The first student to recreate their partner’s map, wins. 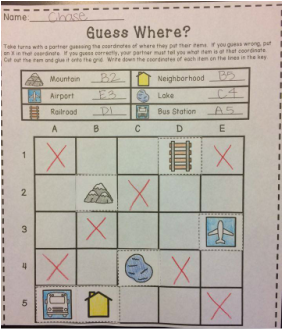
To teach the students about the continent, country, state, and city they live in, I first do a direct instruction mini lesson and show them where all of the places are on a map. Then, we do an atlas scavenger hunt. I had a set of small atlases in my class, so I paired my students up and had them work together to find our continent, country, state, and city, as many times as they could in the atlas and write down the page number. Give them a time limit and make it a “race” to get the students excited. It gives them great practice finding them on various maps.
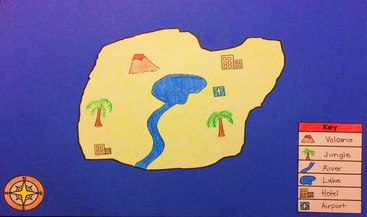
To close up the unit, I have my students create an island. I give them specifications for what the map needs to include, but then let them be as creative as they want. Then, you can have the students answer questions about their map. Included in my pack, along with the materials to have your students make an island map, is a fun writing extension to have your students persuade tourists to come to their island. This was my students’ favorite activity of the unit, and I think it is a fun way to finish up.
I hope this gave you some ideas of how to teach map skills in your class.
Happy Planning! Mackenzie |
AuthorHi! I'm Mackenzie. Teacher, wife, and Washingtonian. Check out my blog to get ideas and products for your class. Archives
December 2016
Categories
All
© Mackenzie Allen 2016.
ALL RIGHTS RESERVED. |
 RSS Feed
